The Lotus Notes client will be available to you until mid summer 2018 so you will have plenty of time to get archives imported. Archives cannot be automatically exported and imported, but we do have a tool that we can manually work with you. Please contact the helpdesk starting in October to schedule a time to process your archives.
Lotus Notes will still be available through the academic year; however, each database and document list in Lotus Notes will need to be moved. Most committees have moved to the portal already but work will continue to move the rest. Items such as the business cards app and food services requests will become portal forms. A new bulletin board is available on the employee tab, while our policies and procedures location will be announced soon.
Conditional formatting allows you to automatically change incoming message colors and fonts based on sender, subject, or recipients. Click here for how-to and more information
With the Outlook roll-out we are standardizing and upgrading everyone's Office version to Office 2016. We will be deploying the improvements to your system using our new System Center Configuration Manager (SCCM) tool. Everyday functions that make up Office 2016 such as Word, Excel, PowerPoint, Publisher, and Access will remain and function similar to their predecessors.
Access Office 365 at: https://portal.office.com
Your username is your Lakeland Email address (Ex. jlaker99@lakelandcc.edu)
Your password is your myLakeland/Active Directory password
Microsoft Teams will replace Sametime Chat within Lotus Notes and will be installed on your PC using the same automated method as Office 2016. Microsoft Teams can also be used within Office 365 online.
Download Microsoft Teams at: https://teams.microsoft.com/downloads.
Please view the table of contents below for more information on Microsoft Outlook employee email.
Access your employee email directly at: https://outlook.office365.com
Your username is your myLakeland username @lakelandcc.edu (Ex. jlaker99@lakelandcc.edu)
If your username contains a number but your email address does not you still need to enter the number to login to Outlook. Your email address will remain the same.
Your password is your myLakeland/Active Directory password
Alternatively you can use the myLakeland QuickLaunch links to Office 365 and Employee Email - Outlook.
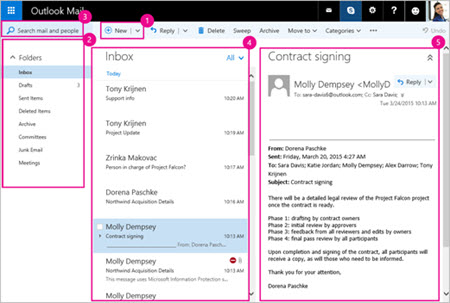
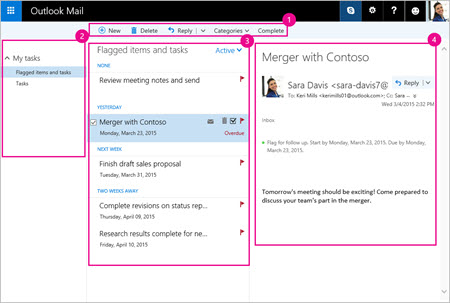
When you login to Employee Email you'll go straight to your Inbox.
| Box | Description | Action(s) | |
|---|---|---|---|
| 1 | Message | Create a new message by choosing  . . | |
| 2 | Folders list |
| |
| 3 | Search box |
| |
| 4 |
| Messages in the current folder are listed. There might be a visual alert that a message is unread, has an attachment, or is flagged. At the top of the message list, you can set how you want to view the list. Choose the  . You can Delete a selected message, Mark as unread, Flag the message, or pin it to Keep this message at the top of your folder. . You can Delete a selected message, Mark as unread, Flag the message, or pin it to Keep this message at the top of your folder. | |
| 5 | Reading pane | The message or conversation that you chose appears in the reading pane. Use the command bar above the reading pane to perform common actions such as deleting, archiving, sweeping, or moving emails.
|
Read and reply to email
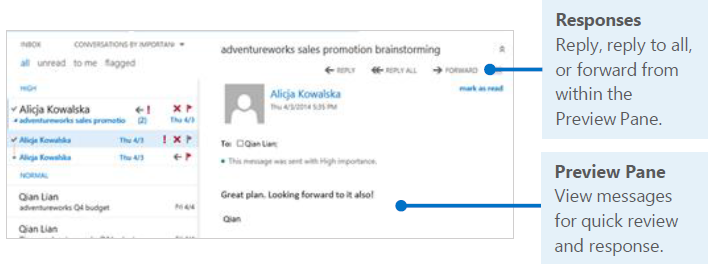
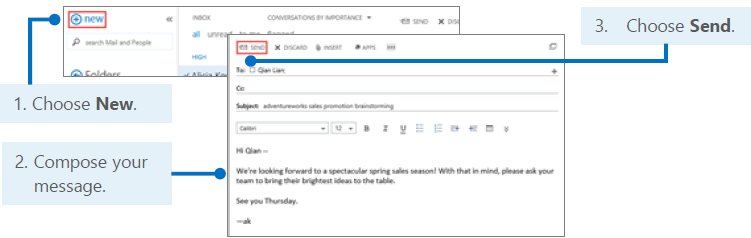
Create and send a new email
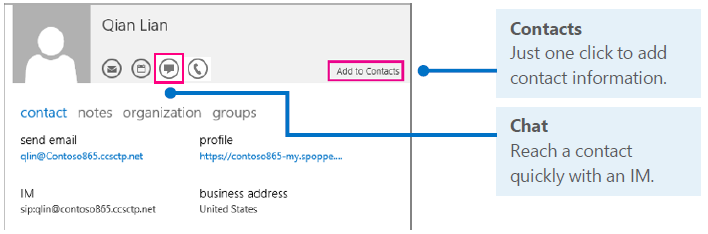
When you get an email message, you can quickly add the sender to your contact list. You can also start a chat, a call, or an email right from the person's card.
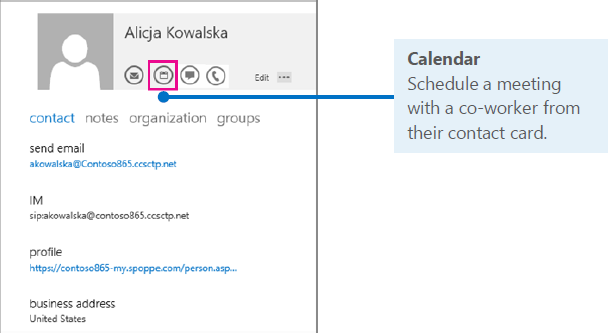
While you have your contact's information card open, you can schedule a meeting right from there.
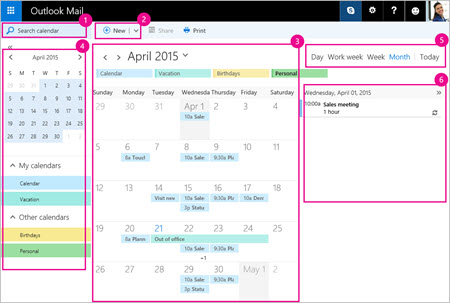
Keep track of appointments, meetings, or any other event from anywhere—as long as you have Internet access. Add, edit, or delete events by using daily, weekly, or monthly views.
| Box | Description | Action(s) | |
|---|---|---|---|
| 1 | Search Calendar | Begin typing the name of a person or an event to locate a meeting or appointment containing a particular contact or event title, and then choose  . . | |
| 2 | New event |
| |
| 3 | My calendars |
| |
| 4 | Other calendars | You can view more than one calendar at a time. Add other people's calendars and select which to display. You also can create new calendars or new calendar groups. | |
| 5 | View options | Choose your calendar view: Day, Work week, Week, Month, or Today. | |
| 6 | Calendar pane | Select a specific day in the calendar, and any appointment or event scheduled for that day is listed in this area. You also can double-click a day or time slot and create a new appointment or event. |
Share or print a calendar
In Outlook.com, you can share a calendar or print a calendar. Start by choosing the action you want on the command bar.

To share a calendar
Each person you choose to share your calendar with will receive your email invitation. The recipient has the option to choose the Add this calendar to view subject, location, availability, and notes link to get access to the calendar you want to share.
Note: Whatever calendar view you have onscreen is previewed.
Options—such as format—available in the Print dialog box might vary based on the chosen calendar view.
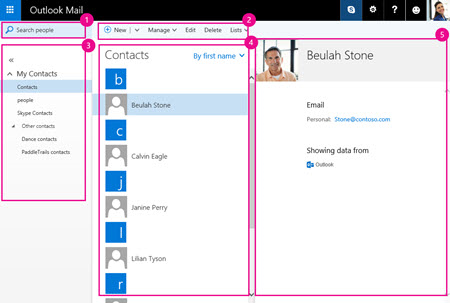
Store and manage all of your contacts in one place. Create new contacts or search for and edit existing ones.
| Box | Description | Action(s) | |
|---|---|---|---|
| 1 | Search People | Begin typing the name of a person you're searching for, and then choose . If the person whose name you typed automatically is matched as someone who already is in your contact list, their email address appears and you can choose it. | |
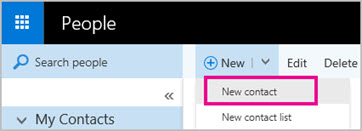
| 2 | Create, edit, or delete contacts |
| |
| 3 | My contacts | Displays folders you can use to manage your contacts. You can create new contact folders and rename or move existing ones.
| |
| 4 | Contacts list | Displays contacts in the selected folder under My Contacts. How contacts are displayed depends on your choices. By default, Display is set to All, Display order to First last, and Sort order to First name. Choose the down arrow next to the current selection to change the options. There also are More options available. Choose a contact to view details in the contact details pane. | |
| 5 | Contact card | Displays information about the contact chosen in the contacts list. Details include any information you might have added about the contact, including phone numbers, address, and any company association. You can connect to a social network with Outlook.com. If you do create a connection, you might be able to link to the contact lists from the social service you're linked to. |
Keep track of things you need to get done, or view and track flagged messages in email that are associated with an action item.
| Box | Description | Action(s) | |
|---|---|---|---|
| 1 | Manage your tasks |
Use the command buttons to help you carry out actions to manage your tasks. You can create a new task or delete an existing one, assign a task to a category, attach a charm (an icon) to a task, or mark a task as complete. Choose
| |
| 2 | My tasks |
| |
| 3 | Tasks list |
| |
| 4 | Task detail | In Tasks, choose a task you created and view details about it. In the details pane, choose |
| Step 1 Download Outlook for iOS from the Apple Store, then Open Outlook for iOS. |  |
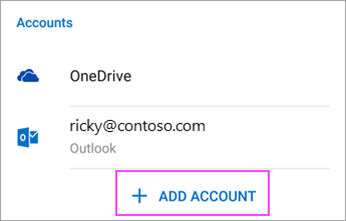
Step 2 Or, open the collapsed menu in the upper left corner > Settings > Add Account > Add Email Account. |  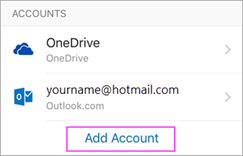 |
Step 3
| |
Step 4 You will be redirected to the myLakeland login page. Enter your myLakeland username and password and tap Login. | 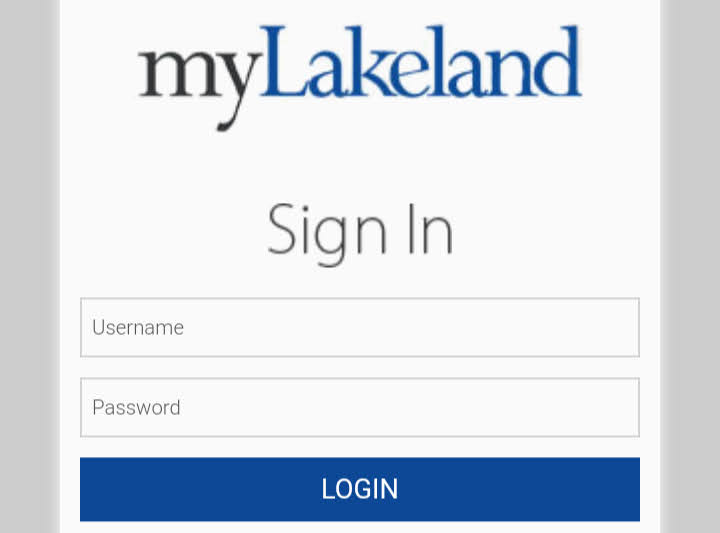 |
| Step 5 Swipe through to view the features of the app and Tap the check or tap Skip. Outlook may request permission to access your calendar, contacts, etc. Tap Yes or Allow. You're now ready to use Outlook! |  |
| Step 1 Go to your device's Settings, scroll down and tap Mail > Accounts >Add Account. | 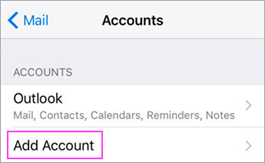 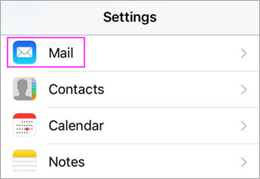 |
| Step 2 Select Exchange. | 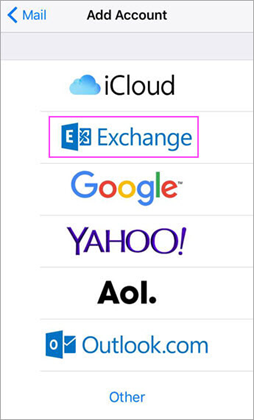 |
| Step 3 Enter your Lakeland employee email address, password, and a description of your account. Tap Next. When prompted to sign in choose Configure Manually. | 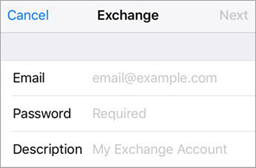 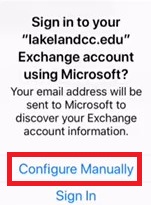 |
Step 4 | |
| Step 5 The Mail app may request certain permissions such as accessing your calendar and contacts. To agree, tap Yes. Then choose the apps you want your email account to sync with your iOS device and tap Save. | |
| Step 6 Now you're all set to go! |
|
| Step 1 Download Outlook for Android from the Google Play Store, then Open Outlook for Android. | |
| Step 2 Tap Get Started if it's your first time. Or, go to Settings > Add Account > Add Email Account. | 
|
| Step 3 Enter your Lakeland employee email address and tap Continue. |  |
| Step 4 You will be redirected to the myLakeland login page. Enter your myLakeland username and password and tap Login. | |
| Step 5 Swipe through to view the features of the app and tap the check or tap Skip. Outlook may request permission to access your calendar, contacts, etc. Tap Yes or Allow. You're now ready to use Outlook! | |
| Step 1 Update your Gmail app to the latest version: • Open the Google Play Store app on your phone. • Type "Gmail" into the search bar and then select Update. Note: If the update option is not available, you're already on the latest version.After the update is installed, tap the Gmail app icon to open it. |  |
Step 2 Go to Settings > Add account>Exchange and Office 365. Important: Do NOT choose "Outlook, Hotmail, and Live" unless you want to sync email only. | 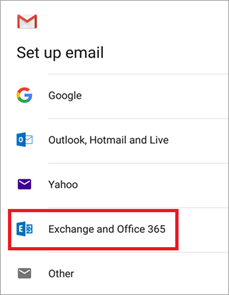 |
| Step 3 Enter your email address. Tap Next. Enter your password and tap Next. | 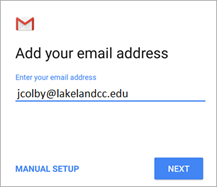 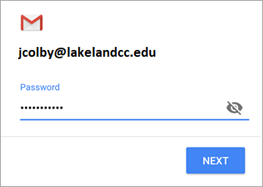 |
| Step 4 Enter the following incoming server settings. Ensure Server is set to outlook.office365.com. Tap Next. | 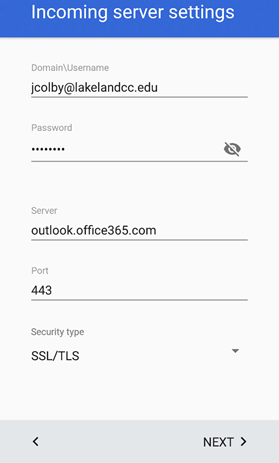 |
| Step 5 Tap OK if prompted to allow remote security administration. | |
| Step 6 Tap Activate to turn on Phone Administrator. | |
| Step 7 Enter the name you would like displayed when you send a message and tap Next. | |
| Step 8 If prompted, tap the notification "Unable to sync calendar and contacts." Tap Allow to provide Gmail access your contacts and Calendar. | 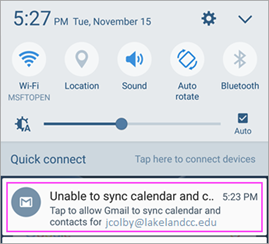 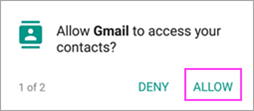 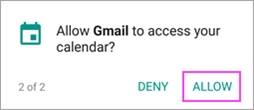 |
| Step 9 You are now ready to use your Lakeland Employee email account! | |
Your personal contact within Lotus Notes will need to be migrated manually to Outlook.
| Open your contacts in Notes and click File > Export Contacts... | 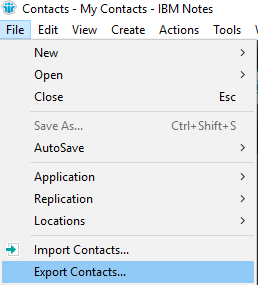 |
| If desired, click the Change Directory button to change the location where the file is to be saved and enter a file name and click Export. | 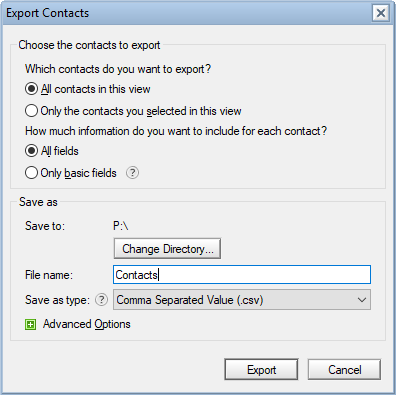 |
Find the export file and make a duplicate copy (just for backup) by right clicking on the file and choosing copy, and then paste it where you would like to save the file. |
Open Outlook, Click File > Open & Export > Import/Export | 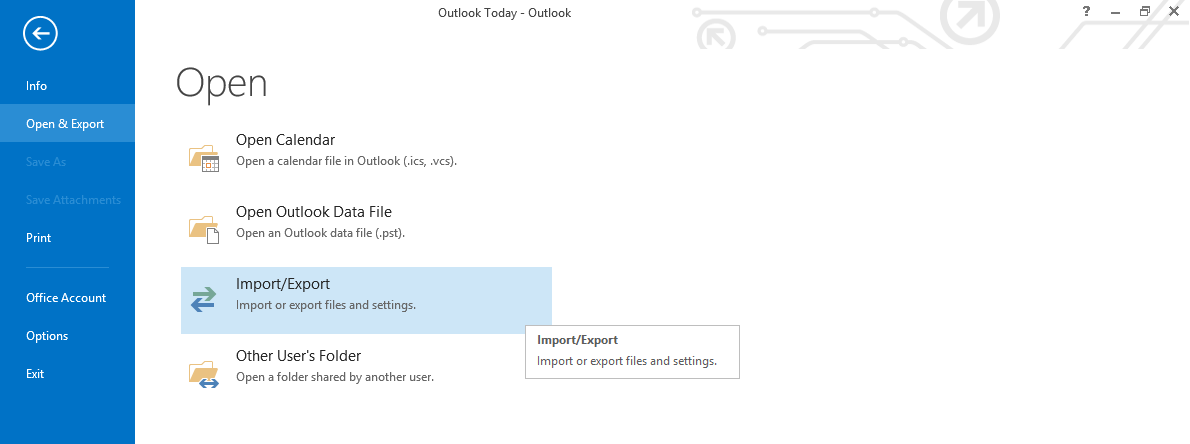 |
Click Import from another program or file, and then click Next. | 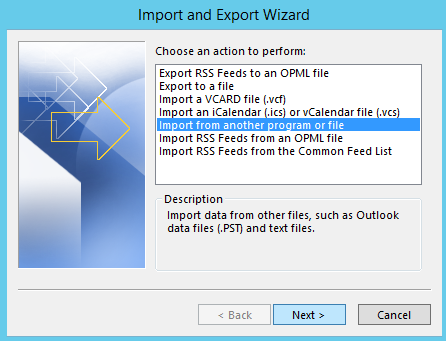 |
Under Select the file type to import, click the Comma Separated Values (Windows) file type, and then click Next. | 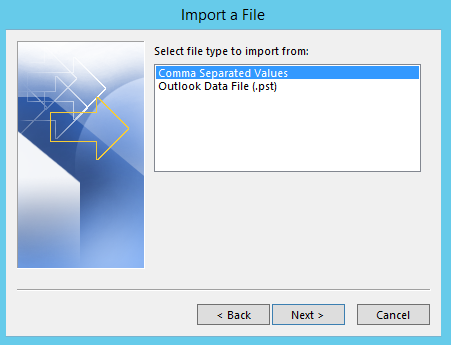 |
Under File to import, click Browse, select the CSV file exported from Lotus Notes, and then click OK. under Options, click one of the following and click Next: Replace duplicates with items imported - If an Outlook contact already exists, it is replaced by the information that you are importing. Do not import duplicate items - If an Outlook contact exists, the information for the imported contact is not imported. | 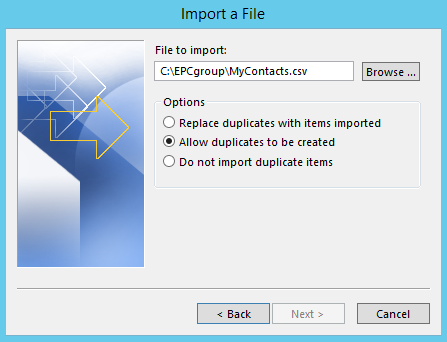 |
In the Import a File dialog box, under Select destination folder, click a folder for the imported contacts, and then click Next. | 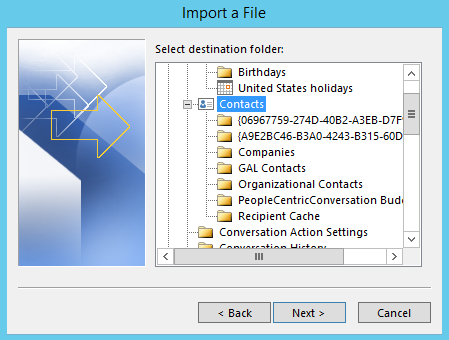 |
Click Map Custom Fields. Drag fields from the .csv file from the left-hand column onto the corresponding Outlook fields in the right-hand column to map them. All other fields are mapped properly. Once finished click OK and Finish. | 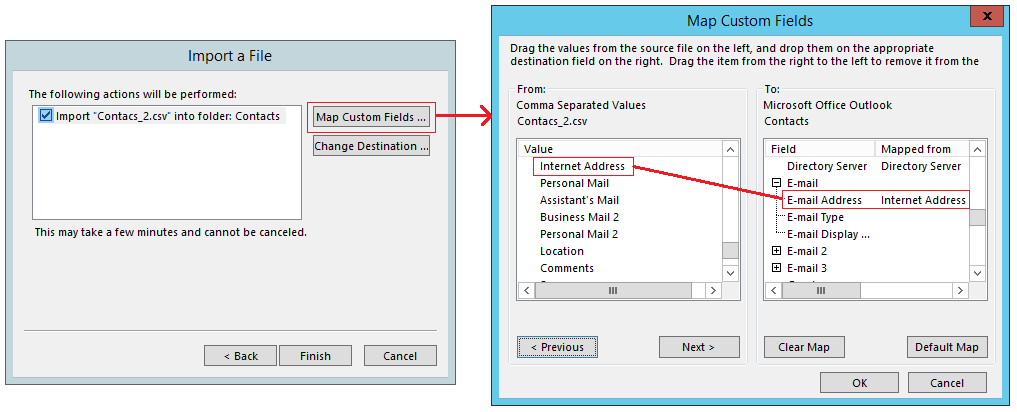 |
To have a Marketing approved signature created for you contact Adam Continenza at acontinenza3@lakelandcc.edu or 440-525-7507.
Using the Marketing approved signature you can adjust the following HTML and place the file:
· Copy and paste the following path into your Windows 7 or 10 search bar within the start menu and hit Enter:
C:\Users\%username%\AppData\Roaming\Microsoft\Signatures
· Drop your HTML signature file into this folder.
o If your HTML file ends with the file extension .html then it needs to be changed to .htm. Right-click on your HTML file and select Rename, then change the file extension to .htm
· Open Outlook, If you already had Outlook running you may need to close it and re-open.
· Click on File, then Options, then Mail, then click on the Signatures button.
· You should see your new signature file in the list in the "Select signatures to edit" box. The name of the signature will be the same as your HTML file name. Your signature may not look correct in the preview area, but do not worry! This is perfectly normal so don't try to make any alterations.
· Make sure you choose your signature in the "New messages" and "Replies/forwards" select menus.
SAMPLE HTML:
<table cellpadding="0" cellspacing="0" border="0"><tr>
<td valign="top" width="30%">
<img src ="http://lkn.lakelandcc.edu/internet/images/signature.jpg" border="0">
</td><td>
<span style="font-family: arial, helvetica, sans-serif;font-size: 9pt;"><b>Your Name</b><br>
<em>Your Position Title</em><br>
(p)440.525.XXXX<br>
<a href="mailto:username@lakelandcc.edu">username@lakelandcc.edu</a><br>
<a href="http://www.lakelandcc.edu/" target="_blank">lakelandcc.edu</a>
</span>
</td></tr></table>
To create a signature in Outlook Web Access:
| Step 1 Click the settings (gear shaped) icon in the upper right corner of the page. |  |
Step 2 | 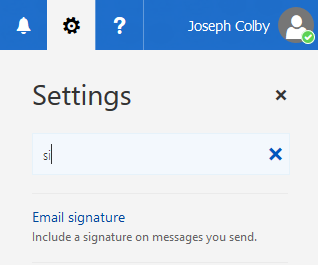 |
| Step 3 In the Email signature textbox click the down arrow (righmost icon) in the upper right then click on table and mouse down to select a 2x1 table. |  |
| Step 4 Copy this image and paste it into the left cell of the table using the Ctrl+V command. You are unable to right click and paste into the table. |  |
| Step 5 Copy this text and past it into the right cell of the table using the Ctrl+V command and edit as necessary. You are unable to right click and paste into the table. | Your Name Your Job Title (p)440.525.7xxx email@lakelandcc.edu lakelandcc.edu |
| Step 6 To make your email address a clickable link highlight your email address click the down arrow and choose Insert Hyperlink and then enter your email address into the URL field. | 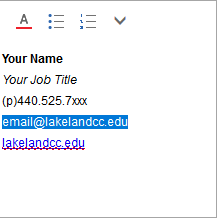 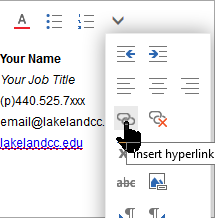 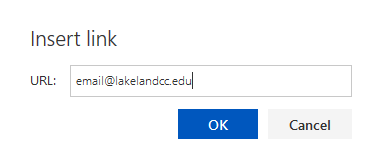 |
| Step 7 To remove the table borders hover over any section of the boarder to make the following icon appear and then right click, choose Style, then Clear. | 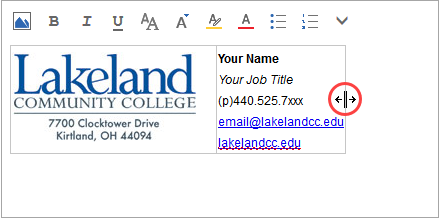 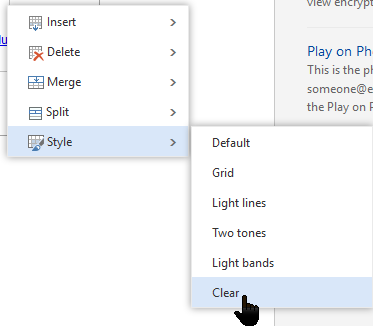 |
| Step 8 Choose the option to Automatically include your signature on new messages or replies and forwards if you would like and then click OK to save your signature. | 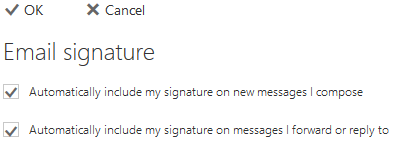 |
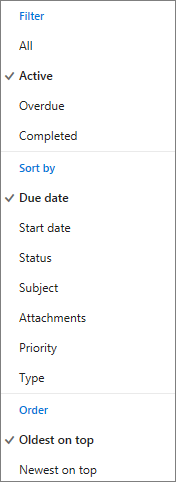
 Refresh
 down arrow, and then choose an option under Filter, Sort by, or View as.


 to create a new task and then in the task form, fill in details as needed.
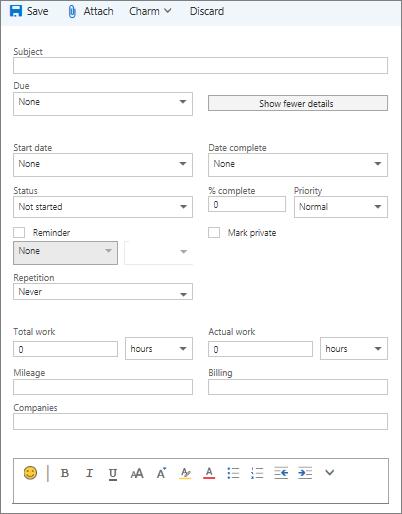

 and change any detail you want about the task. Make sure you Save the changes you make.